+web.jpg)

Photo by Doreen Dierckx in Wall Effects by Katie Ebben
A lacquered wall = elegance, depth, reflection. Seen from the side angle, the light reflects right off of it. Seen from the front, its layers draw you in. There is nothing quite like it.


Photo by Eric Laignel in Color at Home by Meg and Steven Roberts
In the past few years, we have seen an increasing number of lacquered walls in the design /decor magazines and interior designer websites. I, for one, have wall envy when I see one. Catherine Hopkins over at The Shiny Pebble just expressed her wish to re-do her home office walls in a teal-ish shade of blue. Let's see what she will need to do.

With a lacquered wall, the surface prep's importance cannot be overstated.
First, the walls need to be examined closely, preferably with a bright light or two to illuminate the defects. Any dings, nail holes, etc. first need to be filled in. Look at the wallboard seams- can you see them? Can you see the tape that was placed on top of them before painting? If the answer is yes or if you are starting out with walls that are often referred to as "orange peel", as they frequently are in the south and west, the walls will definitely need to be skim-coated. This means that one or two layers of joint compound or Venetian plaster or a similar texture are troweled on to create a smooth surface. This would then be sealed with a primer / sealer.

Paint and Color in Decoration by Farrow and Ball
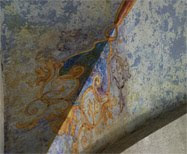
Look closely above the portrait. If your wall prep is not perfect, this is what you'll see throughout.
Sanding between coats and after the final coat is key. (Don't forget- after sanding, you always have to wipe off those areas with a slightly damp cloth to remove the accumulated dust. Otherwise, the next paint layer does not get a good grip and stick properly. Unfortunately, you won't find that out until later- it's not a pretty picture.) The smoother the walls are, the better your wall will look.

Now that is smooth!
Photo by Simon Upton in Paint & Paper by David Oliver
To obtain the smoothest finish possible, the paint layers should be sprayed on. Rollers, even the smoothest sponge rollers, will leave a dimpled appearance. At least two paint layers, if not three or more, will be necessary. Oil paint is preferred because of its leveling-out qualities, but oil paints are banned in many states. An excellent quality of a high gloss paint would then be used. With sanding in between for a fluid finish.

Beautiful! credit
Can you see the difference between spraying, as in the photo above, and this photo below, which appears to have been rolled?

Photo by Eric Laignel in Color at Home by Meg and Steven Roberts
The topcoat layers should also be sprayed. The topcoat of choice is a decision that needs to be made. Years ago, the "real" lacquer, made from lac, a deposit left by the Cocca lacca insect and harvested from the orishi tree in Japan and China, would be used. Because of its poisonous qualities, it is no longer used in most areas. Shellac is now used, usually prepared by the professional using shellac flakes and denatured alcohol. While it is beautiful, it is difficult to work with as it dries quickly, making it challenging on the large vertical surface. An acrylic, water-borne varnish can be used and is preferable for its anti-yellowing nature. A minimum of three, and up to six or seven, sprayed-on layers with wet-sanding several times in between will complete the finish.

Photo by Eric Laignel in Color at Home by Meg and Steven Roberts
To view a spectacular lacquered wall with a damask pattern on top of the paint, see here.
Whew! It's truly an undertaking. Really not a project to take on without lots of previous painting experience. And you must have plenty of time for each of the layers to thoroughly dry before applying the next layer. No wonder it is expensive to do! It is even more labor intensive than a lime Venetian plaster, as seen below. The mottled look of the plaster gives it away.

Photo by Ken Hayden in Paint & Paper by David Oliver
Both demand to be touched and admired!
One of Catherine's readers was thinking about adding gloss stripes to a matte wall to liven things up in a subtle manner. This tone-on-tone look would be accomplished by painting the entire wall in a matte paint color and then filling in the "stripe" with the same color in a gloss finish. Here is a similar idea, using a stencil pattern instead.

Wall Effects by Katie Ebben
I couldn't resist including this photo of one excellent lacquer finish on this table!

Photo by William Waldron in New American Glamour by Jamie Drake
Have you lacquered your walls? If so, we would love to hear about your experiences. Do tell!
And now for a tiny garden update. I've not had time to photograph the lilies in full bloom, except for the Casa Blanca Oriental lily in the front. But what a lily it is!

Caught on my way to the gym! It is taller than I am.




 Posts
Posts