Thursday, July 15, 2010

The truth about Lacquered Walls


Photo by Doreen Dierckx in Wall Effects by Katie Ebben

A lacquered wall = elegance, depth, reflection. Seen from the side angle, the light reflects right off of it. Seen from the front, its layers draw you in. There is nothing quite like it. 


Photo by Eric Laignel in Color at Home by Meg and Steven Roberts

In the past few years, we have seen an increasing number of lacquered walls in the design /decor magazines and interior designer websites. I, for one, have wall envy when I see one. Catherine Hopkins over at The Shiny Pebble just expressed her wish to re-do her home office walls in a teal-ish shade of blue.  Let's see what she will need to do. 


With a lacquered wall, the surface prep's importance cannot be overstated. 

First, the walls need to be examined closely, preferably with a bright light or two to illuminate the defects. Any dings, nail holes, etc. first need to be filled in. Look at the wallboard seams- can you see them? Can you see the tape that was placed on top of them before painting?  If the answer is yes or if you are starting out with walls that are often referred to as "orange peel", as they frequently are in the south and west, the walls will definitely need to be skim-coated. This means that one or two layers of joint compound or Venetian plaster or a similar texture are troweled on to create a smooth surface. This would then be sealed with a primer / sealer.

          Paint and Color in Decoration  by Farrow and Ball

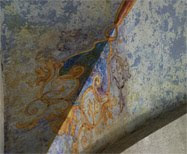
 Look closely above the portrait. If your wall prep is not perfect, this is what you'll see throughout.


Sanding between coats and after the final coat is key. (Don't forget- after sanding, you always have to wipe off those areas with a slightly damp cloth to remove the accumulated dust. Otherwise, the next paint layer does not get a good grip and stick properly. Unfortunately, you won't find that out until later- it's not a pretty picture.) The smoother the walls are, the better your wall will look.

Now that is smooth!   
Photo by Simon Upton in Paint & Paper by David Oliver

 To obtain the smoothest finish possible, the paint layers should be sprayed on. Rollers, even the smoothest sponge rollers, will leave a dimpled appearance. At least two paint layers, if not three or more, will be necessary. Oil paint is preferred because of its leveling-out qualities, but oil paints are banned in many states. An excellent quality of a high gloss paint would then be used. With sanding in between for a fluid finish.

Beautiful!         credit

Can you see the difference between spraying, as in the photo above, and this photo below, which appears to have been rolled?


Photo by Eric Laignel in Color at Home by Meg and Steven Roberts

The topcoat layers should also be sprayed. The topcoat of choice is a decision that needs to be made. Years ago, the "real" lacquer, made from lac, a deposit left by the Cocca lacca insect and harvested from the orishi tree in Japan and China, would be used. Because of its poisonous qualities, it is no longer used in most areas. Shellac is now used, usually prepared by the professional using shellac flakes and denatured alcohol. While it is beautiful, it is difficult to work with as it dries quickly, making it challenging on the large vertical surface. An acrylic, water-borne varnish can be used and is preferable for its anti-yellowing nature. A minimum of three, and up to six or seven, sprayed-on layers with wet-sanding several times in between will complete the finish.  


Photo by Eric Laignel in Color at Home by Meg and Steven Roberts

To view a spectacular lacquered wall with a damask pattern on top of the paint, see here.

Whew! It's truly an undertaking. Really not a project to take on without lots of previous painting experience. And you must have plenty of time for each of the layers to thoroughly dry before applying the next layer. No wonder it is expensive to do! It is even more labor intensive than a lime Venetian plaster, as seen below. The mottled look of the plaster gives it away.

 
Photo by Ken Hayden in Paint & Paper by David Oliver

Both demand to be touched and admired!

One of Catherine's readers was thinking about adding gloss stripes to a matte wall to liven things up in a subtle manner. This tone-on-tone look would be accomplished by painting the entire wall in a matte paint color and then filling in the "stripe" with the same color in a gloss finish. Here is a similar idea, using a stencil pattern instead.

 
Wall Effects by Katie Ebben

I couldn't resist including this photo of one excellent lacquer finish on this table!

Photo by William Waldron in New American Glamour by Jamie Drake

Have you lacquered your walls? If so, we would love to hear about your experiences. Do tell!

And now for a tiny garden update. I've not had time to photograph the lilies in full bloom, except for the Casa Blanca Oriental lily in the front. But what a lily it is!

Caught on my way to the gym! It is taller than I am.

 Thank you, Cindy, at My Romantic Home for Show & Tell Friday. 

Wednesday, July 14, 2010

A French artist's perspective


I recently discovered the unique Jean-Jacques Pigeon, a French artist in the northwest of France near Angers. He both lives and works in his atelier, located in an old match factory, Les Allumettes. 

Here is an artist totally inspired by nature. His mediums include acrylic and ink on paper, acrylic on canvas and nail polish on glass, seen here. 


Cote Ouest magazine  Photo by Jean-Marc Palisse


Cote Ouest magazine  


Jean-Jacques also creates wood "drawings"- silhouettes made of blackened branches, turning the branches into sculptures. They are blackened with iron oxides or pigments of carbon and colors of all kinds. Fragile, light and temporary, they evoke freedom and vulnerability in nature.


Cote Ouest magazine  Photo by Jean-Marc Palisse


To JJ Pigeon, the branch forms are both geometric and poetic. He refers to his use of natural materials as "fusion-creation."


JJ Pigeon may be reached at:
Atelier Jean-Jacques Pigeon
243 Rue Jean-Jaures
49800 Trelaze, France

His works are featured permanently in the Galerie Jamault in Paris 


Sunday, July 11, 2010

Toile Today


Toile du Jouy, the well known design that we love, 
celebrates its 250th birthday this year. Although many of us find that four walls of Toile in a room can be a bit too much, who wouldn't love a touch of it here or there? Who would have known that Toile designs can even have a sense of humor! How would you want to incorporate Toile into your home?


 Artists from around the world are still finding ways to add to its versatility in design. German born Christophe-Phillipe Oberkampf first began producing the patterns in his factory, located in Jouy-en-Josas, a French village close to Versailles. Toile du Jouy, commonly referred to simply as Toile, has been in constant production in various French factories since 1760. **

    Here are artists who have contributed their creativity to this classic pattern. Which designs are your favorites?

Jessica Smith at Domestic Element designs a line of home textiles that apply state-of-the-art techniques with a Bohemian twist to historical motifs. Here are several of her contemporary Toile patterns.

This is South Beach, originally designed for Design 05 at Art Basil- Miami.


Cul-de-Sac reflects a digital map a la Google or Live Local.


Trash Day tells the story of a typical suburban setting on the morning of garbage day, following the sprucing up of the neighborhood yards over the weekend.


Of course, there are many classic Toile du Jouy patterns available in a large range of colors.


Corey Amaro, from Tongue in Cheek's Brocante Market blog, recently sold these gorgeous, antique pillow cases from France.


What great colors!
  
Sheila Bridges' famous Harlem Toile du Jouy pattern comes in six color ways. This pattern is available not only as wallpaper, but also as fabric, bedding, plates and furniture. The wallpaper pattern is now in the Smithsonian Cooper-Hewitt National Design Museum.


Timorous Beasties, a design studio in Glasgow, Scotland, was founded by Alistair McAuley and Paul Simmons. They offer a contemporary graphic style that can be both surreal and sensational.
In their Wallcoverings group's Toile collection,  Decouper 2 is a black and gold pattern on sustainable forest paper.


A totally different approach to incorporating Toile du Jouy in the home is demonstrated by Pat McWhorter from Lane's End Decorative Arts.  She recently took individual elements in the client's Toile pattern and painted them on the adjoining powder room's walls.


 What a charming way to tie the rooms together!


Cynthia Davis from Cynthia Designs applied a texture through a lace pattern to achieve this embossed Toile du Jouy wall finish.


If you do not see exactly what you like in the retail offerings, creating a custom design is a great alternative. There are many stencil design companies offering Toile stencils: The Stencil Library, Designer Stencils and  Jeff Raum Stencils.  


Beatrice Nourissier, a graduate of the Van der Kelen Institute that I wrote about here, paints her inspirations on canvas.


How do you feel about Toile? Would you use it in your home?  

** For further information, I found the website, www.quiltersmuse.com, to be very helpful and thorough. There are also many books on the subject.


Thursday, July 8, 2010

My birthday garden


I celebrated my birthday this week enjoying the mid-summer flowers in the garden. With a lot of watering, everything survived the heat wave. I don't know how the folks in the South handle this heat! I guess I am a Northern gal, through and through!  

I promise- no hydrangeas this week!

One of my favorite summer flowers is the datura. Technically, it is really a brugsmania, but that's too hard to remember! They smell incredible, but only in the evening hours.


We caught the flowers with a visitor:

 
Our poor tomatoes on the left were eaten by the deer.


Cool closeup!

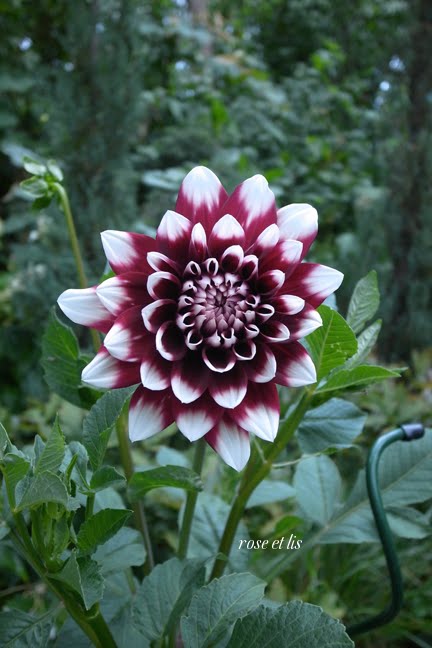
The dahlias are just beginning. (Has anyone noticed that we are about 2-3 weeks ahead of the average year?) 


We take up the dahlia tubers in the fall and store them over the winter in an area that stays around 50 degrees. I love this color...


This is a front yard urn of goodies. Unfortunately, the deer started feasting a few days ago on the back side of the urn.


Here is a closeup of the trailing petunia:


The Oriental lilies are in full swing.


I am hiding- no makeup on!


Succulents in a miniature pot...


Lastly, here are our pineapple lilies beginning their blooms.


Their foliage is an incredible combo of greens. We also remove these tubers from the ground in the fall. They'll be open next week.


Thank you, Cindy, at My Romantic Home
and
Jessica, for Favorite Things Friday.