Showing posts with label Design. Show all posts

Friday, April 2, 2010

A few of my favorite things

Isn't this the cutest thing? When I saw this book, I knew I just had to use it as my Blog Book. It is my calendar of  "assignments," along with topic ideas and potential photos. (I cleaned it up a bit...)

My blog book


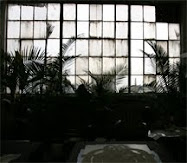
Although I don't remember where I found this photo, I hope to find these candlesticks some day. Anyone know where they are from?


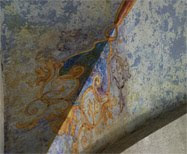
Lately, I've been loving color combinations such as these. The door has a wonderful patina which looks like old lime paint. I love the teal and burgundy together.


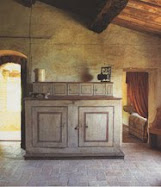
I saw this ad last year and have been trying to decide where to try this color combo from Ligne Roset. It's not just the color combo, though. It is the lushness of the velvet in contrast with the aged roughness of the concrete.


Today's favorite things is going to become Friday's Favorites. I'd love to see what items and ideas my fellow bloggers love, too!

Monday, March 29, 2010

An Italian groin vault ceiling... in America

How can one pass up a week in a Tuscan villa? Located just inside of Umbria, an hour from Florence, this to-die-for villa was all you'd expect it to be. (Villa pics coming later.) With the villa serving as our base, we roamed the surrounding areas and just soaked it all in.

While traveling through Arezzo (east of Florence), we fell in love with these groin vaulted ceilings in a non-descript deli. We walked in for lunch, looked up and that was it! So typical of Italy- there is such beauty at every turn.

Arezzo, Italy groin vault ceiling

A few years ago, my SO opened a boutique/cafe that was based on our passion of Italian design. We blew up our video frames of the dome ceiling that we loved in Arezzo to see the pattern and attempted to re-create those designs.

I started out with m-a-n-y sample boards to figure out the finishes; here is one of the final boards- I think I finally figured it out!


Sample board


The groin vault domes (formed by the intersection of two or more barrel vaults) began with a custom engineered metal frame.

Drywall was affixed to the metal frame and the entire ceiling, especially the many seams, was smoothed, filled, sanded, followed by filling and sanding and filling and sanding. The plasterer (Thanks, Dan!) did an AWESOME job.


I first primed twice and basecoated twice before even thinking of the finish layers. Then I began applying the three plaster layers, using a custom mix for each layer. The first layer was ochre and lapis blue; the second and third layers were more of what you see- the whites and lapis blues.

Then we painted the designs, some freehand and some with a few specific designs cut in mylar to be consistent on site, trying to stay as close to the original ceiling design as possible.

Once the painting was complete, we added a layer of glaze to “knock back” and age the finish.

We only had 2 weeks to take the ceiling from the raw drywall and seams state to completion.

Still adding! These are the electrical guys for the chandelier installation.


Here we are at work...

The ceiling is 25 feet up there!

Adding details
Here is the beautiful Isola Bella groin vault ceiling, ready for the chandelier to be installed!

 
We're done! Just waiting for  the chandelier.

 
Closeup view of groin vault  seam
Wednesday, March 24, 2010

Go For the Gold... As In Gold Leaf

An elegant addition to any décor is to add the touch of gold or silver leaf to furniture or accessories. Whether accenting the special molding on a table or gilding a picture frame, the gold surface adds a special opulence and shimmer that cannot be replicated with metallic paint. When held up to the light, the sheet of gold leaf is so thin that it is semi-transparent. As a result, gilding should be done in a draft free environment. Any drafts of air will cause the leaf to literally blow away.

My own gilded table


My own renovated and gilded frame


Darnell Demilune Commode by Amy Howard in House Beautiful


Silver leaf table legs


There are two methods of gilding: oil gilding and water gilding. Oil gilding uses an oil size upon which, once it dries to a slight stickiness or “tack”, the gold leaf is gently laid on the surface and carefully pressed. Water gilding is a highly specialized craft used for applying gold on frames and furniture.

Create a screen like this with the fabulous stencils that are available now. An online search will bring up many stencil companies, such as Royal Design Studio or Cutting Edge Stencils.

Gilded screen Photographer: Erik Johnson


These arches were gilded with an oil size using Dutch (composite) leaf and sealed with Liberon wax.

Isola Bella gilded arches


Please join me again for Part two on gilding. I’ll explain the various types of gold leaf and offer reliable sources for supplies, books  and instruction. If you'd like any other facets of gold leaf gilding to be covered, please let me know.