Showing posts with label Plasters. Show all posts

Monday, March 29, 2010

An Italian groin vault ceiling... in America

How can one pass up a week in a Tuscan villa? Located just inside of Umbria, an hour from Florence, this to-die-for villa was all you'd expect it to be. (Villa pics coming later.) With the villa serving as our base, we roamed the surrounding areas and just soaked it all in.

While traveling through Arezzo (east of Florence), we fell in love with these groin vaulted ceilings in a non-descript deli. We walked in for lunch, looked up and that was it! So typical of Italy- there is such beauty at every turn.

Arezzo, Italy groin vault ceiling

A few years ago, my SO opened a boutique/cafe that was based on our passion of Italian design. We blew up our video frames of the dome ceiling that we loved in Arezzo to see the pattern and attempted to re-create those designs.

I started out with m-a-n-y sample boards to figure out the finishes; here is one of the final boards- I think I finally figured it out!


Sample board


The groin vault domes (formed by the intersection of two or more barrel vaults) began with a custom engineered metal frame.

Drywall was affixed to the metal frame and the entire ceiling, especially the many seams, was smoothed, filled, sanded, followed by filling and sanding and filling and sanding. The plasterer (Thanks, Dan!) did an AWESOME job.


I first primed twice and basecoated twice before even thinking of the finish layers. Then I began applying the three plaster layers, using a custom mix for each layer. The first layer was ochre and lapis blue; the second and third layers were more of what you see- the whites and lapis blues.

Then we painted the designs, some freehand and some with a few specific designs cut in mylar to be consistent on site, trying to stay as close to the original ceiling design as possible.

Once the painting was complete, we added a layer of glaze to “knock back” and age the finish.

We only had 2 weeks to take the ceiling from the raw drywall and seams state to completion.

Still adding! These are the electrical guys for the chandelier installation.


Here we are at work...

The ceiling is 25 feet up there!

Adding details
Here is the beautiful Isola Bella groin vault ceiling, ready for the chandelier to be installed!

 
We're done! Just waiting for  the chandelier.

 
Closeup view of groin vault  seam

Friday, March 26, 2010

Monochrome

...as in the book, Monochrome, by Paula Rice Jackson. I thought I'd share some of my favorite photos from this quietly elegant book on one way to use color.

While I love color, especially how Mother Nature combines them, there is something soothing and exciting when you walk into a room and you just feel the balance and harmony of the subtle nuances of color.

The funny thing about using one color is that it takes just as much attention to detail as it does when using a range of colors.


Designer: Nancy Corzine


Designer: Vicente Wolf


Designer: Vicente Wolf


The marble wall is beautiful, wouldn't you agree?

Designer: John Saladino


The Venetian plaster walls in these photos are so...well, you just want to touch them! These monochrome walls are inspiring!

Designer: Philippe Starck


Designer: Philippe Starck

Wednesday, March 17, 2010

What is scratch coat plaster anyway?

My favorite interior designer, John Saladino, recently featured scratch coat plaster walls in the January-February 2010 issue of Veranda magazine. The article, Saladino in SoHo, presented John’s designs, inspired by the Vermeer-based film Girl With a Pearl Earring, for the Veranda NYC show house.

Photography by Antoine Bootz in Veranda magazine


Photography by Antoine Bootz


Photography by Antoine Bootz


Saladino often features walls made with plaster that appear less “finished”.  He describes the walls as scratch-coat plaster or brown-coat plaster. What are they?

Back in the days before drywall, the walls in a home were made out of real plaster. The plaster application usually consisted of three steps: the scratch coat, followed by the brown coat and ended with the finish coat.

The first “scratch” coat (also called the intonaco) is embedded onto a wood lath (today metal lath is available which will not warp) and is the base coat. The scratch coat gets its name from the fact that it is physically scratched with horizontal marks. These scratches create the “key” for the next coat to grab onto. The second coat, the brown coat, is applied very thin and creates the flat surface for the finish coat. In Tuscany, this coat is called velo, meaning veil, since it is so thin. The final “finish” coat is a very thin coat that must be kept wet and troweled to a smooth, hard finish. When dry, it will be rock solid and shiny like marble. The finish coat is the thinnest of the coats, and its purpose is to impart a decorative surface to the plaster. The smoother the wall, the more labor involved.

Scratch, brown, and finish coats all have slightly different proportions. Scratch coats are mixed at 1 part cement to 2-1/4 to 4 parts sand, brown coats are mixed at 1 part cement to 3 to 5 parts sand, and finish coats are 1 part cement to 1-1/2 to 3 parts sand.

If you like that look, be sure to check out Saladino’s first book, Style by Saladino. It is full of similar looks. In one, he mixes instant coffee with the plaster and then dried it with the radiator turned on full blast to cause parts of the plaster to dry faster than others, causing the dried colors to vary.

Saladino's wall of brown scatch-coat plaster using
Saladino's wall of scatch-coat plaster using instant coffee with the plaster Photographer: Lizzie Himmel


Scratch coat plaster in John Saladino's book, Style by Saladino 


Axel Vervoordt, a fabulous Belgian designer, also favors walls that are more “natural”. Here he mixes lime with powder pigments and earth found locally on the property. Scratch coat plaster walls and these lime and pigment walls are both ancient and modern... and very "green".

From Axel Vervoordt's book, Timeless Interiors

Tuesday, March 2, 2010

Get Rid of Wallpaper Once and For All!


Off with the wallpaper! Here's what Frank Faulkner did:

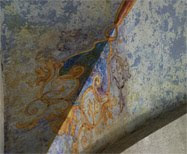
Frank Faulkner is a Top 50 New York Designer, according to NY Spaces Magazine. He not only is a fabulous designer, but he is also a very talented artist. One of Frank's recent homes is now featured in the March 2010 issue of NY Spaces Magazine. The circa 1870 home is in Hudson, NY. Having removed the old wallpaper, Frank decided to leave the living room walls "exactly as they were when we tore the wallpaper off, he says, cracked plaster, patination, and all."

I was recently at a client's home where the wallpaper had been stripped. Personally, I loved how the walls looked without anything further being done to them. It's a matter of taste... wallpaper be gone!

Here are a few shots:

"Au naturelle" walls close up


Walls left "natural" after wallpaper removal

Friday, February 5, 2010

Damask in glass and gold tiles

I LOVE this!
These glass and 24 carat gold mosaic tiles are arranged in a damask pattern that is fabulous!
Carlo Dal Bianco's "Damasco Oro Giallo" tiles are seen at the website: http://www.carlodalbianco.it/

Glass tiles are everywhere right now...

[caption id="attachment_144" align="aligncenter" width="223" caption="Gold and glass tiles in damask pattern"]glass tiles in damask pattern[/caption]

This inspired me to create a faux finish for an accent wall with a similar feel. My first step will be to trowel on the "grout" layer using a metallic plaster. Then I'll figure out what medium to use to give the look of glass tiles. A little tricky- I've been trying a lot of things, but it's not quite there yet. The damask pattern will be an oversize one and the "gold" tiles will be created with gold leaf. Pics of the process coming soon...

Friday, January 15, 2010

What a fabulous wall!

[caption id="" align="alignnone" width="591" caption="Gjelina in LA"][/caption] Photography: Art Gray

This is the new LA restaurant, Gjelina. I would have loved to have seen the plaster design being made.
Go to www.gjelina.com for more information, hours, etc...