Friday, April 9, 2010

Beautiful lime plasters

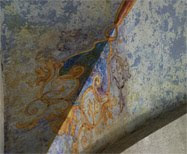
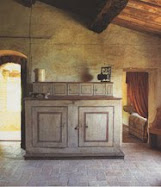
Once you’ve seen an authentic lime washed wall, you’ll remember it. Touch a smooth lime plaster wall and you’ll remember it. There is something about its sleek, creamy feel…  If you’ve traveled in Italy or France or Mexico, chances are that you’ve seen these mottled, weathered, lime plaster walls.
They seem as hard as stone and that is because they are.


Lime based plasters and paints are mixed with natural pigments only. The pigments must be suitable to mix with the lime or they will not remain stable and fade over time.


Lime plaster has been used for thousands of years. The entire process is long and involved. Limestone is “cooked” until the chunks disintegrate and become a powder known as calcium oxide. This lime powder is then mixed with water and left to slowly age or “slake”. It is this slaked lime, in a putty form, that is mixed with varying amounts of marble dust and sand. The pigments are added at this time. In this day and age, other ingredients are often added to the lime plaster mix.

Generally, several layers are applied to the walls. As the lime dries, the water is absorbed into the wall and the carbon dioxide “slakes” the lime, rendering the material back to limestone. And it is as hard as stone.

Applying lime plasters directly to a latex or alkyd (otherwise known as oil based) painted wall will not work; lime plasters and paints need to have a special base that allows the lime to adhere to it.
Lime washes are created by mixing the lime putty with water to a milky consistency and applying the wash with a brush.  It has a faded, almost pastel look, that appears authentically weathered.  Lime based paints are generally used to let the walls “breathe” rather than locking in humidity. They are excellent for bathrooms and kitchens as they are a deterrent to mold. The original "green" finish.

Doors with blue lime wash Photo by Yann Monel

Photo by Ricardo Labougle


 Lime wash on exterior Photo by Carlos Domenech

 Photo by Carlos Domenech

 Photo by Eric Piasecki

        Photo by Carlos Domenech


Lime wash walls Photo by Simon McBride

Monday, April 5, 2010

I want to live here!

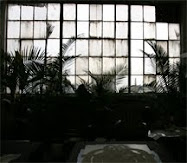
I just fell in love with Claire Basler’s studio/home when I opened the March 2010 issue of Elle Décor UK. An old iron works building on the outskirts of Paris houses this wonderfully talented artist. Claire’s love of flowers and her garden are certainly reflected in her work.

Being surrounded by so much natural light and having the subject you love to paint right at your fingertips sounds heavenly.

The colors mixed with the grays, the old and the new, the shiny and the textured… the combinations work.

Here it is! (All photos from Elle Décor UK, photos by Mads Mogensen)


A few of her paintings (courtesy of http://www.clairebasler.com/):


I love the silver and gold leaf backgrounds in these photos!


Sunday, April 4, 2010

Mariano Fortuny- Did you know he also painted?

When I think of Mariano Fortuny, lush velvets and delicate, pleated silks come to mind.  The “Delphos” dress is a classic. The “Fortuny lampshade” is also. The beautiful damask fabrics, the gorgeous clothes.  His mystique.  What I did not realize is that he was also a very gifted painter. And engraver. And stage and lighting set designer. Some of his inventions set new benchmarks in theater that are still followed today.


La Pedrera de Caixa Catalunya (the museum) in Barcelona, Spain is currently holding an exposition on Fortuny and his works: Fortuny, El mag de Venecia (Fortuny, The Magician of Venice).
Besides viewing his incredible fabrics, clothing and inventions, there are also presentations, discussions and a tactile tour of fabrics. I wish I was in Barcelona! I think they should bring this wonderful display to the USA!


Silk lampshades in Mariano Fortuny 1999 Marsilio Editori


Fortuny velvet


Mariano Fortuny (y Madrazo) was born in Grenada, Spain in 1871. After his painter father’s early death at age 36 of malaria in 1874, his mother moved her two young children to Paris, where Mariano was encouraged to study painting and etching under his uncle’s tuteledge. He was introduced to many of the artists at the time through his family and exposed to many styles of painting.   In 1889, his mother moved the family to Venice. Mariano spent time in both Venice and Paris, before finally settling in the Palazzo Orfei.  Today it is now called the Palazzo Fortuny, as it houses the museum dedicated to Fortuny and his works.

Here are some views of the Palazzo Fortuny:

Palazzo Fortuny exterior in Fortuny by Guillermo de Osma


Palazzo Fortuny exterior in Fortuny by Anne-Marie Deschodt


The Grand Salon in Fortuny by Anne-Marie Deschodt


The library in Fortuny by Anne-Marie Deschodt


Fortuny's studio in Fortuny by Anne-Marie Deschodt


Fortuny worked in oils, gouache and tempera, creating his own color pigments. He favored copper plate etching, which, along with his painting, greatly influenced his later creations in silk and velvet. He learned the subtle use of color and the importance of light to achieve the dramatic effects seen in his textiles.

Here are  some of Fortuny’s paintings:

Una roccia a pareti verticali sulla riva del mare" 1948


Prove alla Scala di Milano


Ritratto di Henriette Fortuny in costume pompeiano, 1935

Here Fortuny painted his own Palazzo:

Interno dell'atelier del pittore a palazzo Pesaro-Orfei a Venezia


http://www.invertirenarte.es/mercadodearte/imagenes/Octubre%2027/duran_fortuny.jpg
Painted by Fortuny's father, Mariano Fortuny Y Marsal (1835 - 1874)

And last, but not least, my favorite:

Schizzo per la decorazione dell'atelier dell'artista a Venezia

Friday, April 2, 2010

A few of my favorite things

Isn't this the cutest thing? When I saw this book, I knew I just had to use it as my Blog Book. It is my calendar of  "assignments," along with topic ideas and potential photos. (I cleaned it up a bit...)

My blog book


Although I don't remember where I found this photo, I hope to find these candlesticks some day. Anyone know where they are from?


Lately, I've been loving color combinations such as these. The door has a wonderful patina which looks like old lime paint. I love the teal and burgundy together.


I saw this ad last year and have been trying to decide where to try this color combo from Ligne Roset. It's not just the color combo, though. It is the lushness of the velvet in contrast with the aged roughness of the concrete.


Today's favorite things is going to become Friday's Favorites. I'd love to see what items and ideas my fellow bloggers love, too!

Monday, March 29, 2010

An Italian groin vault ceiling... in America

How can one pass up a week in a Tuscan villa? Located just inside of Umbria, an hour from Florence, this to-die-for villa was all you'd expect it to be. (Villa pics coming later.) With the villa serving as our base, we roamed the surrounding areas and just soaked it all in.

While traveling through Arezzo (east of Florence), we fell in love with these groin vaulted ceilings in a non-descript deli. We walked in for lunch, looked up and that was it! So typical of Italy- there is such beauty at every turn.

Arezzo, Italy groin vault ceiling

A few years ago, my SO opened a boutique/cafe that was based on our passion of Italian design. We blew up our video frames of the dome ceiling that we loved in Arezzo to see the pattern and attempted to re-create those designs.

I started out with m-a-n-y sample boards to figure out the finishes; here is one of the final boards- I think I finally figured it out!


Sample board


The groin vault domes (formed by the intersection of two or more barrel vaults) began with a custom engineered metal frame.

Drywall was affixed to the metal frame and the entire ceiling, especially the many seams, was smoothed, filled, sanded, followed by filling and sanding and filling and sanding. The plasterer (Thanks, Dan!) did an AWESOME job.


I first primed twice and basecoated twice before even thinking of the finish layers. Then I began applying the three plaster layers, using a custom mix for each layer. The first layer was ochre and lapis blue; the second and third layers were more of what you see- the whites and lapis blues.

Then we painted the designs, some freehand and some with a few specific designs cut in mylar to be consistent on site, trying to stay as close to the original ceiling design as possible.

Once the painting was complete, we added a layer of glaze to “knock back” and age the finish.

We only had 2 weeks to take the ceiling from the raw drywall and seams state to completion.

Still adding! These are the electrical guys for the chandelier installation.


Here we are at work...

The ceiling is 25 feet up there!

Adding details
Here is the beautiful Isola Bella groin vault ceiling, ready for the chandelier to be installed!

 
We're done! Just waiting for  the chandelier.

 
Closeup view of groin vault  seam